I know what it’s like to invest in a quality brush and then watch it fall apart because you weren’t sure how to care for it.
Your Higossis brush isn’t just another makeup tool. It’s built to deliver flawless application every single time. But only if you treat it right.
Here’s the thing: most people destroy their brushes without realizing it. They use the wrong cleaners or let product build up until the bristles lose their shape. Then they wonder why their makeup doesn’t look as good as it used to.
I’m going to show you how to clean higossis brush the right way. Not some complicated routine you’ll never follow. A simple process that actually works.
We’ve tested dozens of cleaning methods and products to figure out what keeps bristles soft and performance sharp. This guide is based on what actually preserves brush integrity, not what sounds good in theory.
You’ll get a repeatable routine that takes minutes. One that protects your investment and keeps your brush performing like the day you got it.
No guesswork. Just the exact steps you need to follow.
Why Proper Brush Care is Non-Negotiable
You might think I’m being dramatic.
But your brushes? They’re either working for you or against you. There’s no middle ground.
Let me break down what actually happens when you skip cleaning.
Performance takes a hit first. Clean bristles grab product and lay it down evenly. Dirty ones? They’re already loaded with yesterday’s foundation and last week’s eyeshadow. You end up with streaky application and colors that look muddy no matter how good your technique is.
Then there’s the longevity issue.
Product builds up at the base of the bristles where they meet the ferrule (that’s the metal part that holds everything together). That buildup breaks down the adhesive over time. Next thing you know, you’re finding loose hairs all over your face mid-application.
But here’s what really matters.
Your skin.
Dirty brushes collect bacteria, oil, and dead skin cells every single time you use them. Then you press all that back into your pores the next day. Breakouts and irritation aren’t random. They’re often sitting right there in your brush cup.
Now, if you’re using how to clean Higossis brush techniques properly, you’re protecting something else too. The bristles themselves.
These fibers aren’t like the cheap synthetic ones you find everywhere. They need specific care to keep their shape and that soft blending capability you bought them for in the first place.
Skip the cleaning and you’re basically paying premium prices for tools that perform like drugstore brushes.
Your call.
The Higossis Difference: Understanding Your Tool’s Anatomy
You can’t clean your Higossis brush the same way you’d clean a cheap drugstore one.
I know that sounds snobby. But there’s a real reason why.
Your brush isn’t just bristles on a stick. It’s three distinct parts that each need different care.
The Bristles
These fibers are synthetic but they’re designed to act like natural hair. That means they pick up pigment beautifully and blend like a dream.
But here’s what makes them different. They’re engineered to absorb almost no product. That’s why your makeup goes on your face instead of disappearing into the brush.
When you’re figuring out how to clean Higossis brush fibers, remember this. They don’t need harsh treatment because they’re not holding onto tons of product in the first place.
The Ferrule
This metal band is where most people mess up.
It holds everything together with adhesive. Get water inside that ferrule and you’re basically dissolving the glue that keeps your bristles attached.
That’s why your brush starts shedding. Not because it’s poorly made. Because water got where it shouldn’t be.
Keep water away from the ferrule. That’s the whole game.
The Handle
Most Higossis handles are weighted and balanced. Some have a lacquered finish that feels good in your hand.
Wood and water don’t mix. You already know this.
Soaking the handle leads to cracking and peeling. The finish breaks down and suddenly your beautiful brush looks beat up.
My advice? Treat each part with respect and your brushes will last for years.
The Deep Cleaning Ritual: A Step-by-Step Guide

I still remember the first time I really looked at one of my brushes under good light.
The bristles were caked with foundation. Dried powder sat wedged near the ferrule. I’d been using that thing on my face every single day.
Not my proudest moment.
That’s when I realized something. Most of us know we should clean our brushes. We just don’t know how to do it right.
I’m going to walk you through exactly how to clean higossis brush the way it’s meant to be done. This works whether you’re dealing with foundation buildup or just regular maintenance.
Step 1: Gather Your Supplies
You need three things. A gentle brush cleanser or baby shampoo, a silicone cleaning mat, and lukewarm water.
Skip the harsh soaps. They strip the natural oils from the bristles and break down the glue in the ferrule over time. I learned this the hard way when a $40 brush fell apart after I used dish soap on it.
Step 2: Wet the Bristles
Here’s where most people mess up. For the full picture, I lay it all out in How to Get Higossis Brush.
Angle the brush downwards under running water. Only the bristles should get wet. If water seeps into the ferrule, it loosens the glue that holds everything together.
Think of it like washing your hair upside down. You want gravity working with you.
Step 3: Lather and Cleanse
Put a small amount of cleanser on your mat. Swirl the brush gently in circular motions.
You’ll see the makeup start breaking down almost immediately. Keep swirling until you’ve worked up a good lather. The silicone nubs on the mat do most of the work for you.
Step 4: Rinse Thoroughly
Rinse under lukewarm water with the brush still angled down. Keep going until the water runs completely clear.
This takes longer than you think. What looks clean often isn’t.
Step 5: Remove Excess Water & Reshape
Gently squeeze the bristles with a clean towel. Don’t pull or tug at them.
Then reshape the brush head back to its original form. This matters more than you’d think. Brushes that dry misshapen stay misshapen.
Step 6: The Drying Process
This is where patience comes in.
Lay the brush flat on a clean towel with the bristles hanging over the edge of your counter. This gives you 360-degree air circulation. Or use a brush drying rack to hang it upside down.
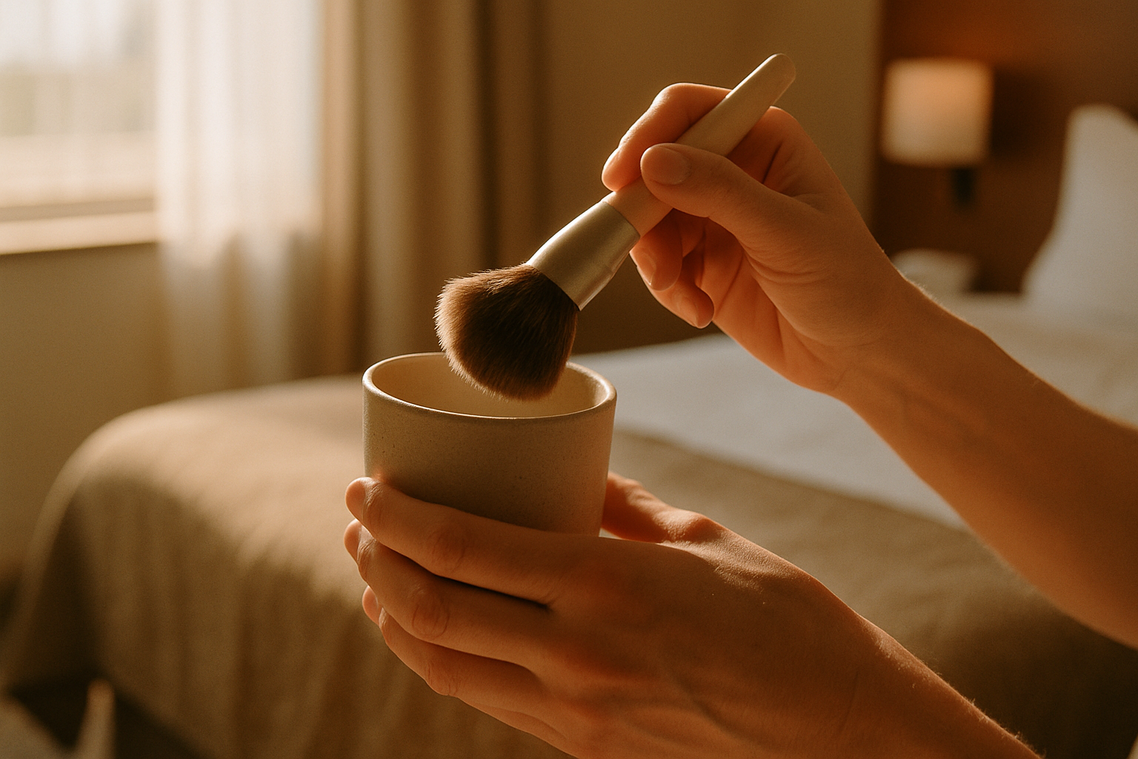
Never dry your brushes standing up in a cup. Water drips into the ferrule and you’re back to square one.
I usually clean my brushes at night and they’re ready by morning. Some people ask is higossis brush good for concealer after they’ve deep cleaned it, and honestly? A clean brush performs better no matter what you’re using it for.
Your brushes will last years if you treat them right.
Daily vs. Weekly Maintenance: A Simple Routine
You don’t need to overthink this.
Most people either clean their brushes obsessively or forget about them for months. Neither approach works well.
Here’s what I recommend instead.
After every use, take 30 seconds and swirl your brush on a microfiber cloth. Just gentle circles to lift off the surface powder or pigment. This stops buildup before it starts.
Think of it like wiping down your kitchen counter. You wouldn’t let crumbs pile up for weeks, right?
For brushes you use with cream or liquid products, do a quick spot clean once a week. Grab a daily brush cleaning spray and a paper towel. Wipe the bristles until they look clean again. Takes maybe a minute.
Now here’s the part most people get wrong.
They skip the deep clean entirely or do it way too often. If you’re wondering how to clean higossis brush properly, the answer depends on how much you use it.
For personal use: Deep clean every 2 to 4 weeks.
For professional use: You’ll need to do it more often. Think weekly or after every few clients.
I know that sounds like a lot. But once you get into the rhythm, it becomes automatic. You’ll notice your brushes perform better and your skin stays clearer.
The key is consistency, not perfection.
Common Mistakes That Ruin Premium Brushes
You just spent good money on quality brushes.
Now here’s how most people accidentally destroy them.
Mistake 1: Soaking the entire brush. I see this all the time. You think a deep soak will get it cleaner. But water seeps into the ferrule (that metal part holding the bristles) and breaks down the adhesive. The handle swells and warps too.
Mistake 2: Using high heat to dry faster. A hairdryer seems like a smart shortcut. It’s not. Heat singes delicate fibers and can actually melt synthetic bristles. Your brush loses its shape and you’re left with a frayed mess.
Mistake 3: Drying it upright in a cup. This one feels natural. But gravity pulls water straight down into the ferrule. That causes rust on the metal and makes bristles shed everywhere.
Mistake 4: Storing it while damp. You’re tired after your routine and just toss it in a drawer. Bad move. Moisture trapped in the bristles becomes a breeding ground for mildew and bacteria. This connects directly to what I discuss in How Does Higossis Brush Made.
Want to know how to clean higossis brush the right way? Rinse only the bristles under lukewarm water. Reshape gently. Lay flat on a towel to dry.
That’s it. Four simple mistakes that’ll cost you your favorite brushes if you’re not careful.
A Lifetime of Flawless Application
You now know exactly how to keep your Higossis brush in perfect condition.
A beautiful brush can turn into a problem fast without the right care. Buildup happens. Bristles splay. Performance drops.
But this routine changes that.
Protect the ferrule. Use gentle cleansing. Dry it properly. That’s all it takes to preserve your brush’s integrity and keep your application flawless.
I’ve seen too many people invest in quality tools and then let them fall apart. You don’t have to be one of them.
Make this cleaning ritual part of your beauty routine. Set a schedule that works for you and stick to it.
Your brush will last for years. Your makeup will look better every single time you apply it.
The difference between a brush that performs and one that doesn’t comes down to these simple steps. You have them now.
Use them.
 There is a specific skill involved in explaining something clearly — one that is completely separate from actually knowing the subject. Ricardofads Flagg has both. They has spent years working with everyday glam hacks in a hands-on capacity, and an equal amount of time figuring out how to translate that experience into writing that people with different backgrounds can actually absorb and use.
Ricardofads tends to approach complex subjects — Everyday Glam Hacks, Gossis Aesthetic Techniques, Modern Beauty Basics being good examples — by starting with what the reader already knows, then building outward from there rather than dropping them in the deep end. It sounds like a small thing. In practice it makes a significant difference in whether someone finishes the article or abandons it halfway through. They is also good at knowing when to stop — a surprisingly underrated skill. Some writers bury useful information under so many caveats and qualifications that the point disappears. Ricardofads knows where the point is and gets there without too many detours.
The practical effect of all this is that people who read Ricardofads's work tend to come away actually capable of doing something with it. Not just vaguely informed — actually capable. For a writer working in everyday glam hacks, that is probably the best possible outcome, and it's the standard Ricardofads holds they's own work to.
There is a specific skill involved in explaining something clearly — one that is completely separate from actually knowing the subject. Ricardofads Flagg has both. They has spent years working with everyday glam hacks in a hands-on capacity, and an equal amount of time figuring out how to translate that experience into writing that people with different backgrounds can actually absorb and use.
Ricardofads tends to approach complex subjects — Everyday Glam Hacks, Gossis Aesthetic Techniques, Modern Beauty Basics being good examples — by starting with what the reader already knows, then building outward from there rather than dropping them in the deep end. It sounds like a small thing. In practice it makes a significant difference in whether someone finishes the article or abandons it halfway through. They is also good at knowing when to stop — a surprisingly underrated skill. Some writers bury useful information under so many caveats and qualifications that the point disappears. Ricardofads knows where the point is and gets there without too many detours.
The practical effect of all this is that people who read Ricardofads's work tend to come away actually capable of doing something with it. Not just vaguely informed — actually capable. For a writer working in everyday glam hacks, that is probably the best possible outcome, and it's the standard Ricardofads holds they's own work to.